
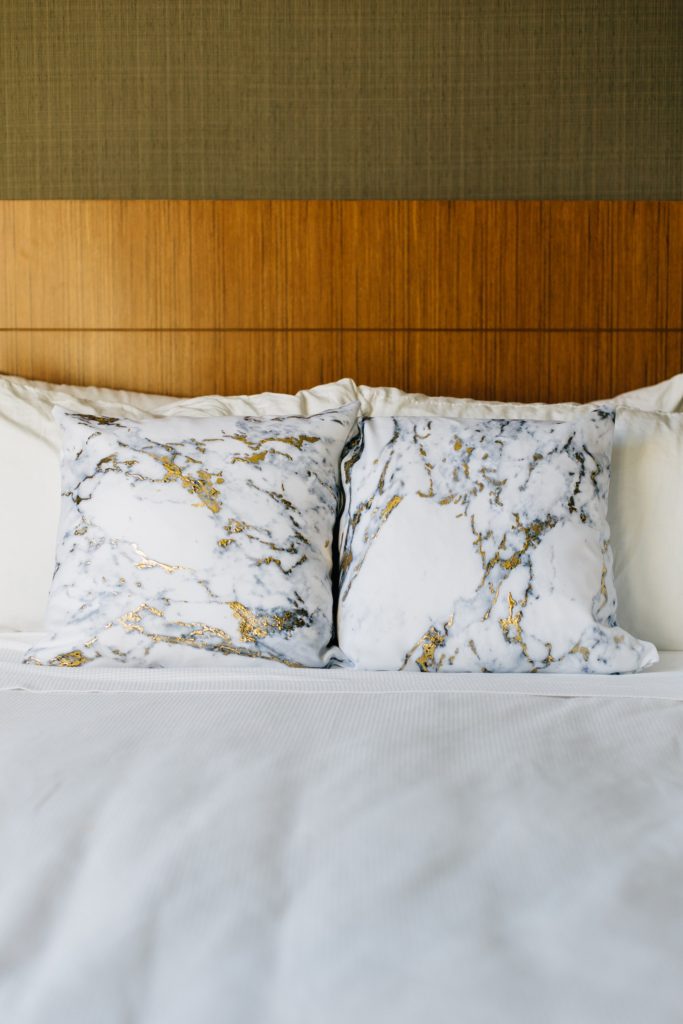
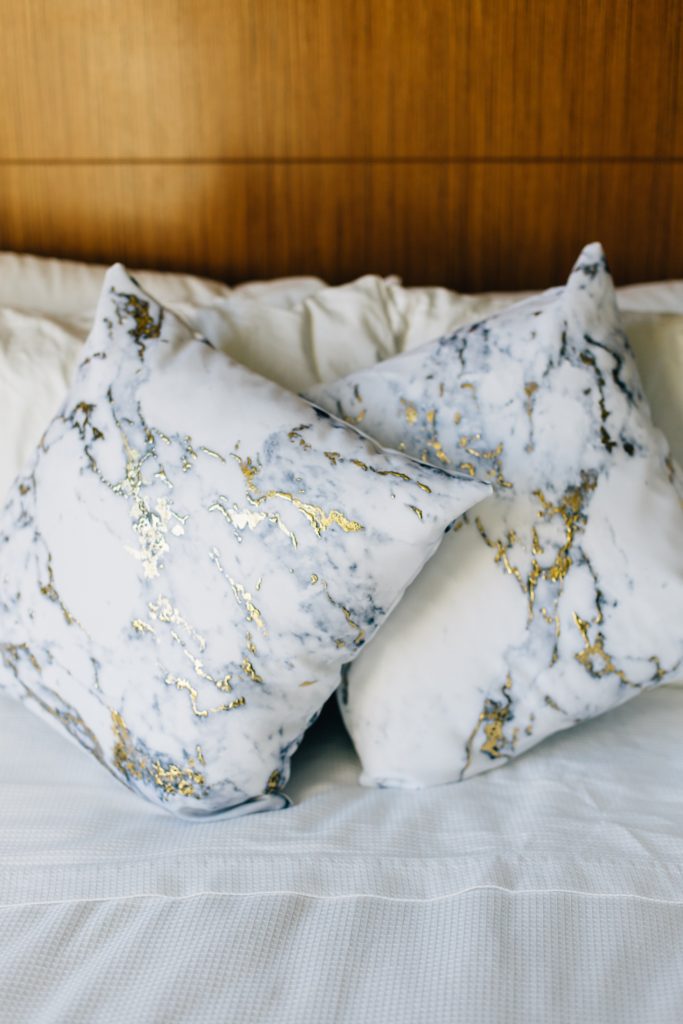
That gold foil sparkle is top o’ mind these days, and we’re incorporating it into everything from stationery to decorative accessories. Enter The Pretty Life Girls, blogging sisters and crafters-in-crime who dreamed up this easy pillow DIY to spruce up bedrooms, living rooms, and dorm rooms just in time for spring. Let’s get crafting!
Originally posted at The Pretty Life Girls
Supplies
2 Custom Throw Pillows from Snapfish
Marble image, available for purchase and download through digital photo sites
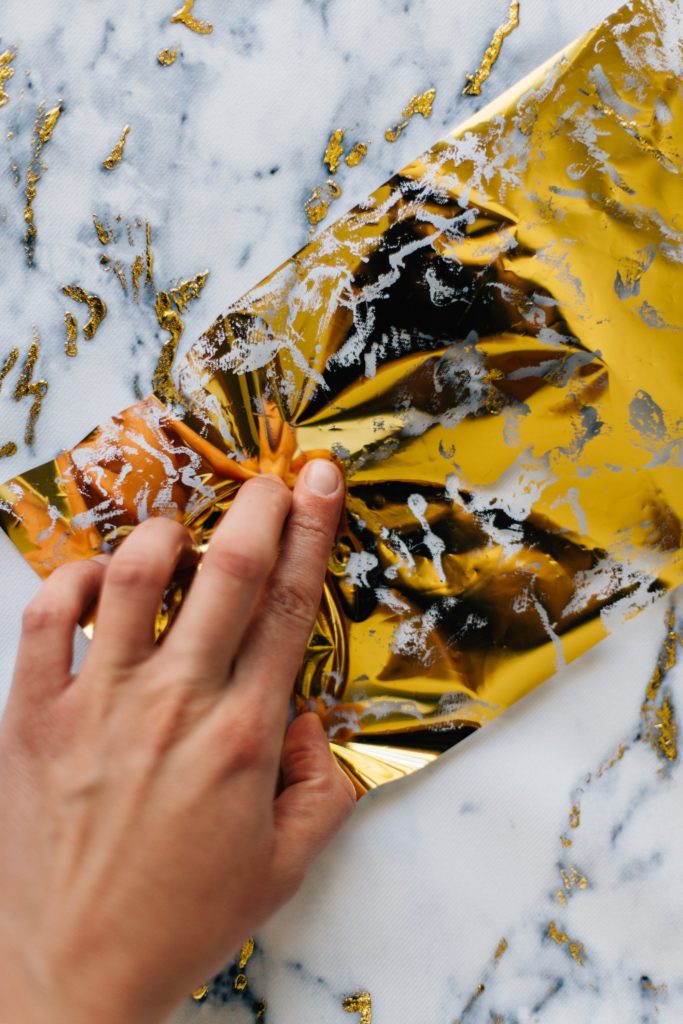
Gold foil
Foil adhesive
Paint brush
Instructions
Step 1: Upload marble image to your Snapfish pillow project and place order.
Step 2: Once you receive your pillows, remove the cover.
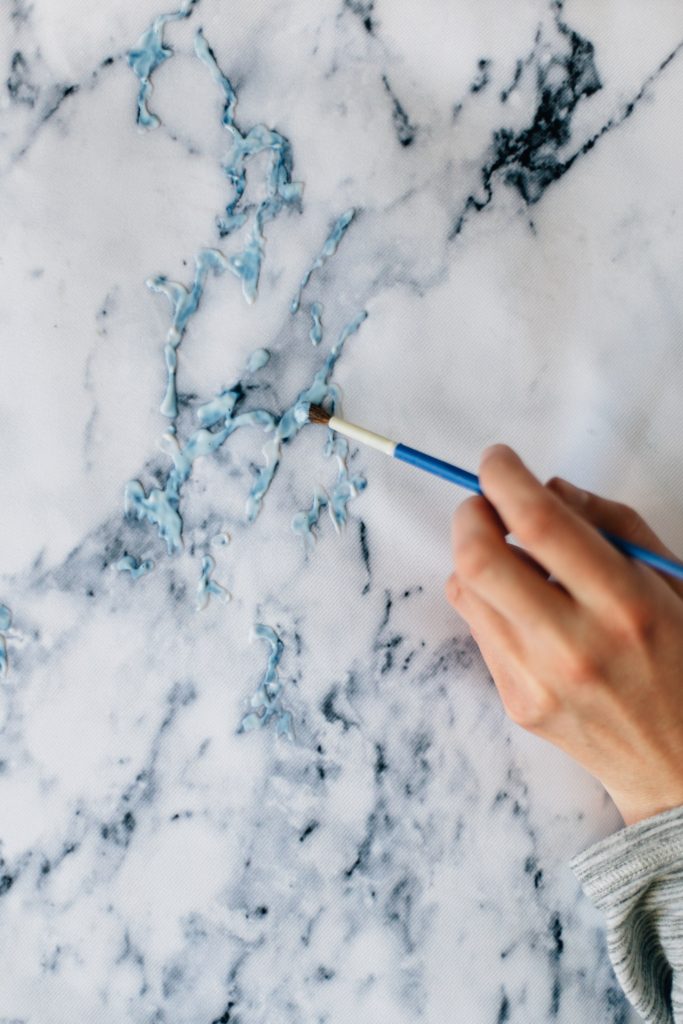
Step 3: Apply the adhesive to the cover according to your preference. I traced the dark parts of the marble with the glue and used a paint brush to spread it around on certain spots. Let dry for 1-2 hours until clear and slightly tacky.
Step 4: Lay the foil (gold side up) on the glue. Rub with your finger over the glue.
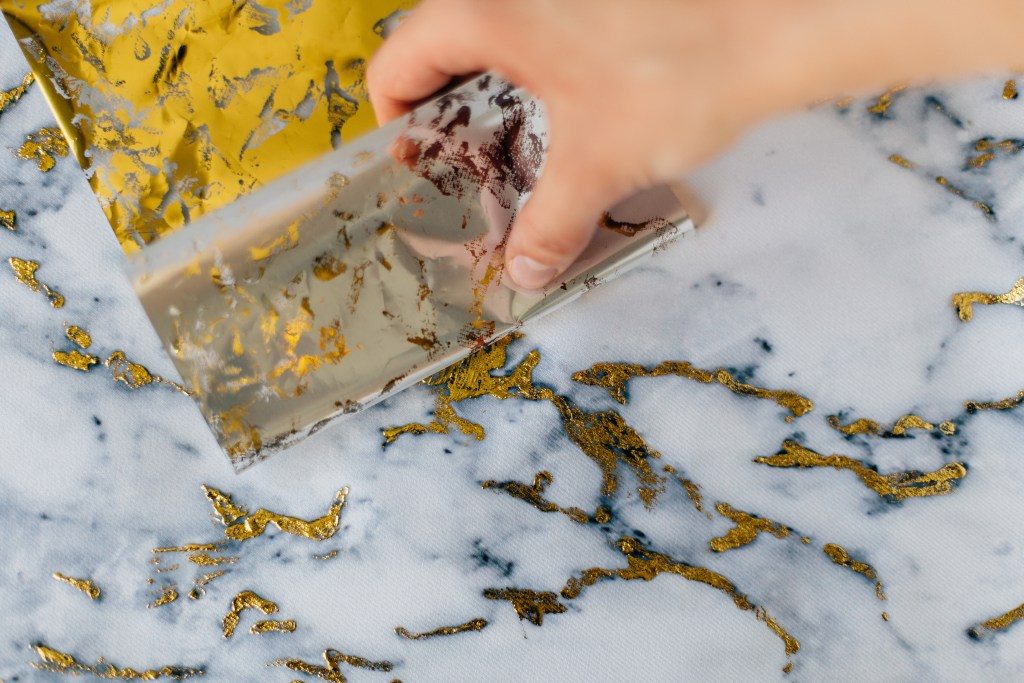
Step 5: Peel the foil back. Repeat until you have foiled all the areas where you added glue.
Step 6: Put the pillow back in the cover, and enjoy your beautiful, one-of-a-kind pillows!
Check out the full post on The Pretty Life Girls.
Special blog promotion! Enjoy 60% off all orders $40+ with code 60MAR2018 for a limited time. Shop pillows >
All photos courtesy of The Pretty Life Girls.
We love seeing what you come up with! Please tag us @SnapfishUS and #snapfish on Facebook, Instagram & Pinterest. Check out the Snapfish site for even more custom gift ideas.