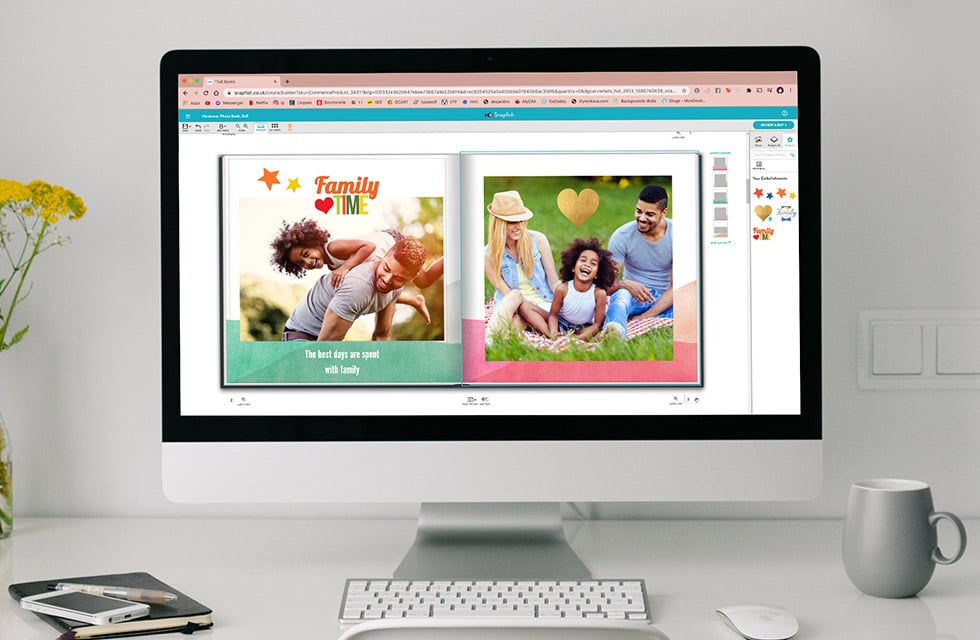
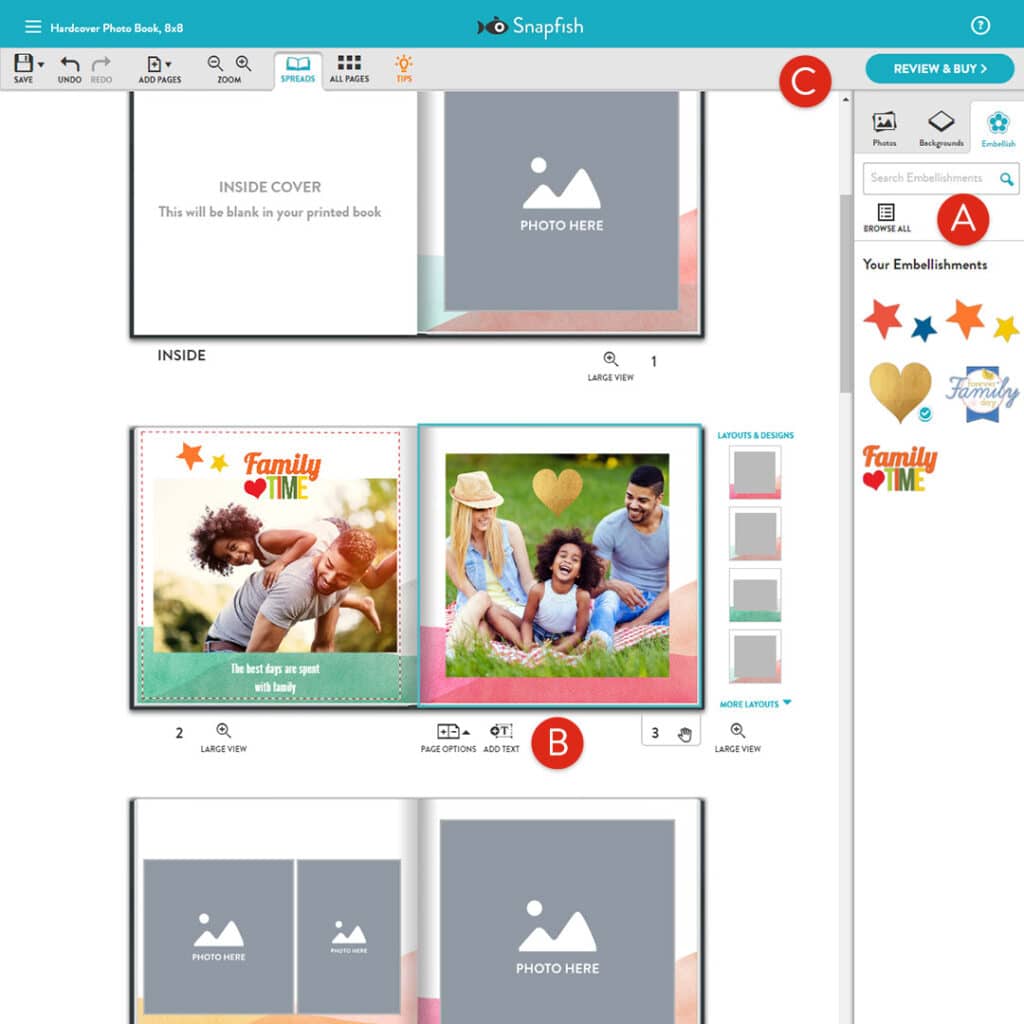
View our 4-step guide to creating your very own personalized photo book.
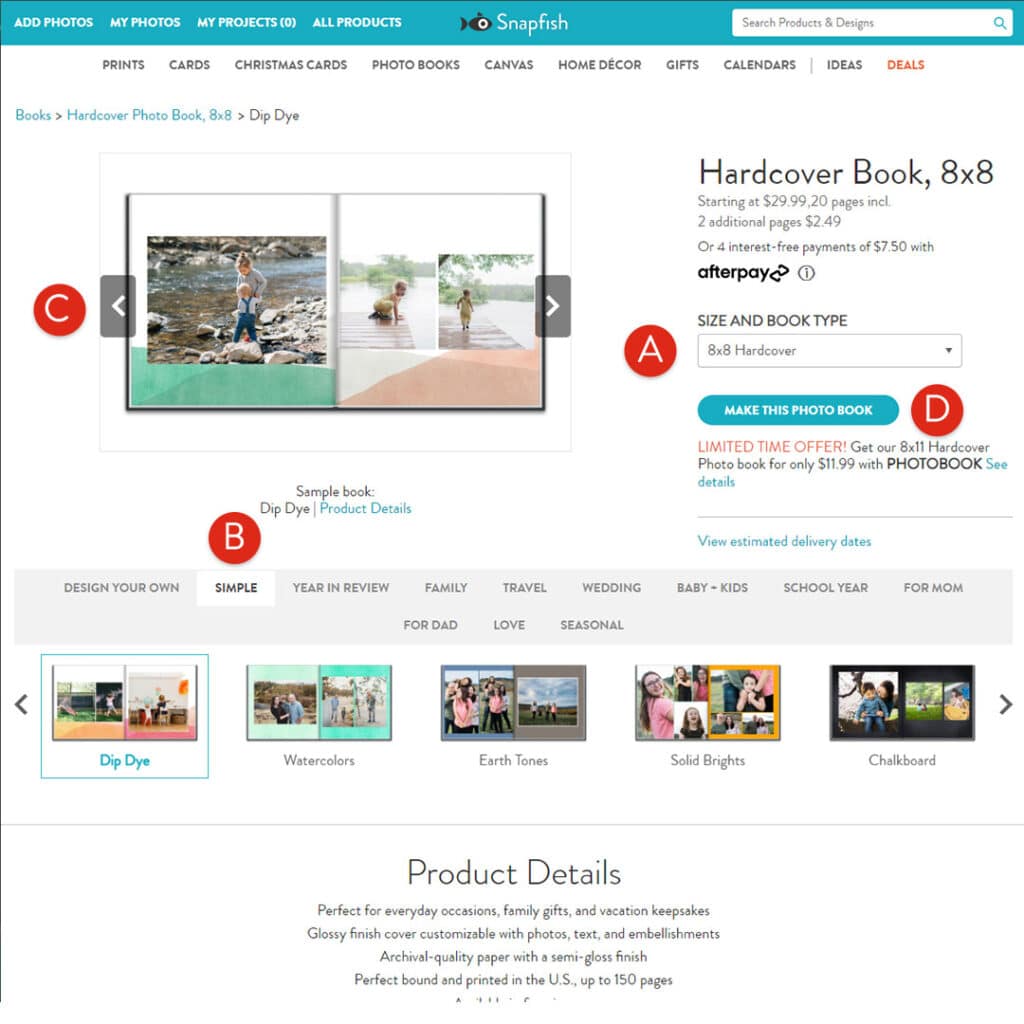
1. Choose Your Book
Choose your desired book from the PHOTO BOOKS page, then follow these steps:
A. Select a SIZE and BOOK TYPE (if you’re still undecided).
B. Pick a design category (e.g. PATTERNS), then select a design (e.g. Dip Dye).
C. The book preview will be updated with the selected design.
D. Once you have chosen a design, select the MAKE THIS PHOTO BOOK button.
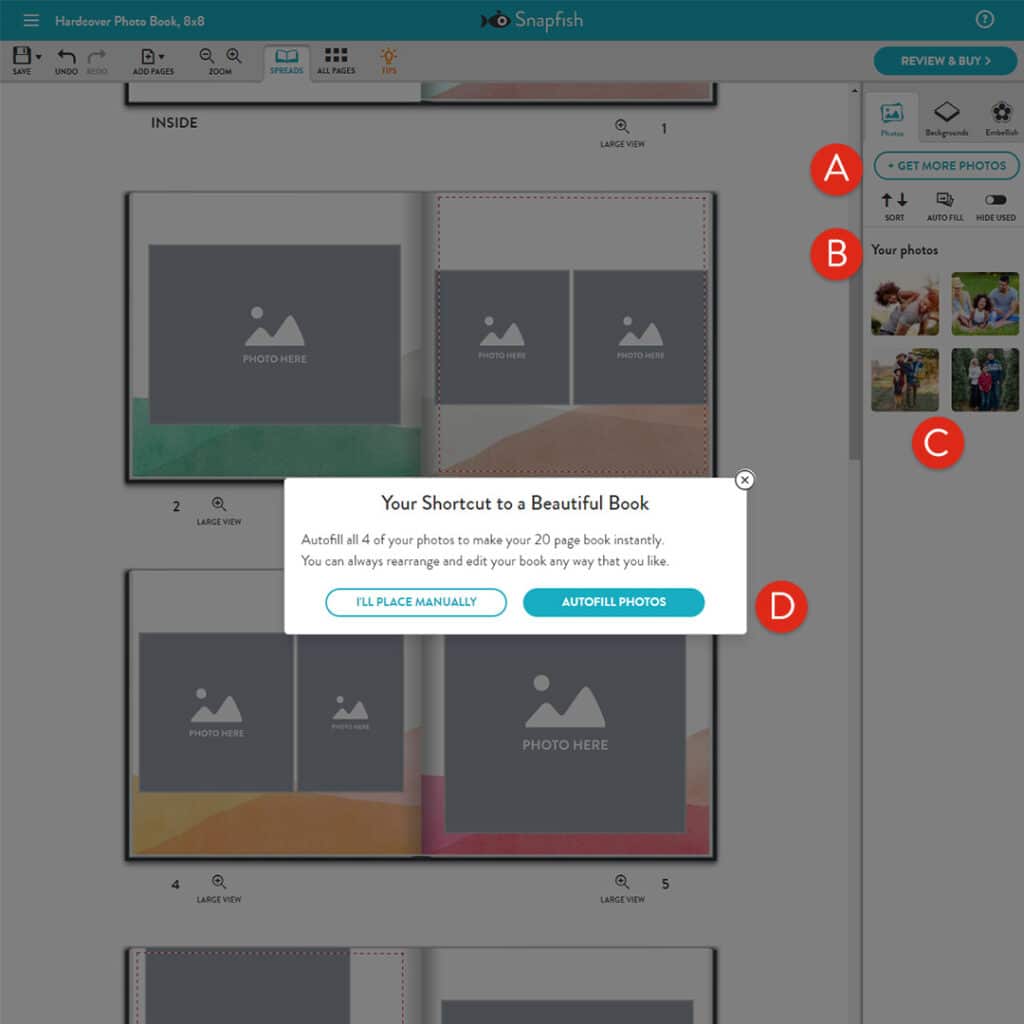
2. Add Photos Using Autofill
A. Select the GET PHOTOS button to open the photo picker.
B. Import photos from your device, Facebook, Instagram or Google Photos.
C. Select the photos you’d like to use, then select the ADD TO PROJECT button.
D. Select Autofill to automatically populate your book with your selected photos.
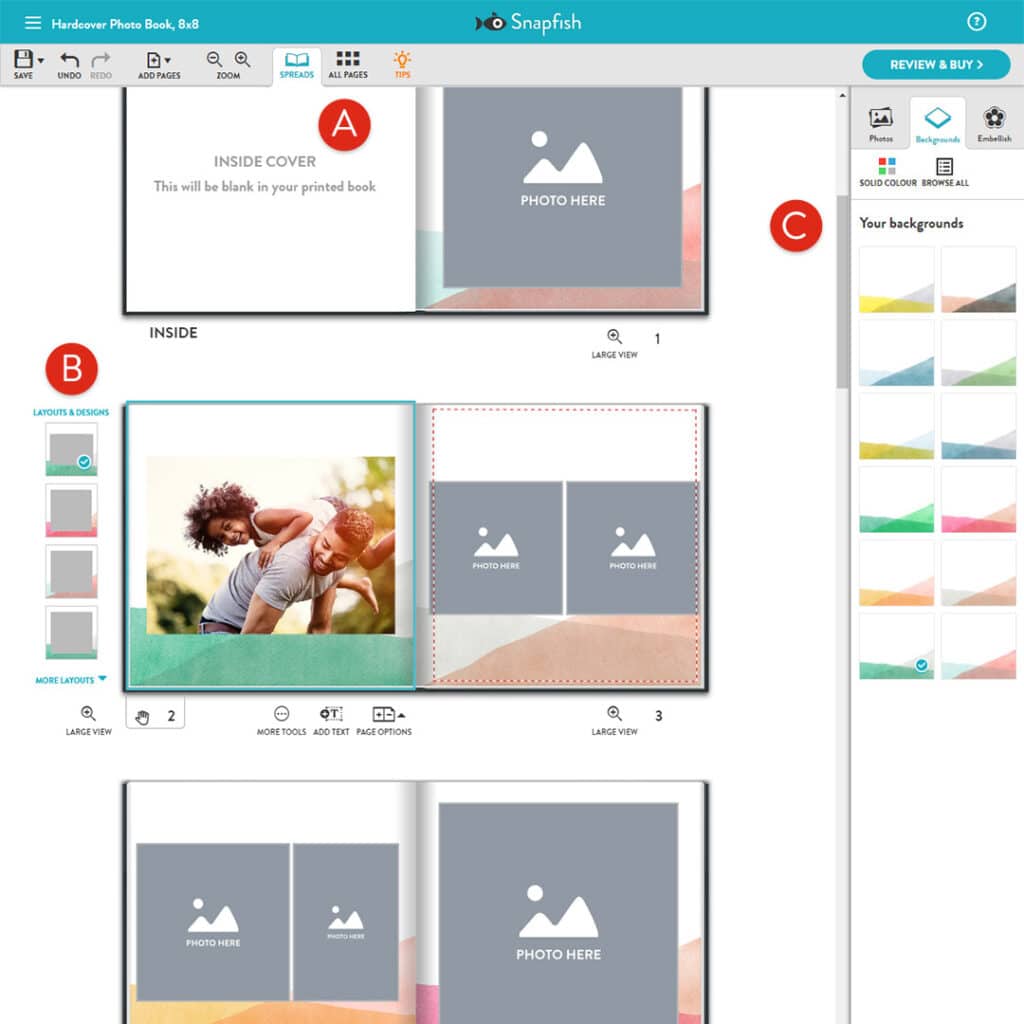
3. Customize With Layouts and Backgrounds
Once you start adding photos you may like to change the layout or background of a page:
A. To get an overview of your entire book, select the Book View icon at the top right of the book builder.
B. Layouts enable you to modify a page with the selected photo frame layouts.
C. Backgrounds enable you to change the backdrop of a specific page.
4. Personalize With Embellishments and Text
Personalize your book with text and decorate with embellishments:
A. Embellishments give you the freedom to explore your creative side. Add as many as you want!
B. Text enables you to add more personality to your book.
C. Once you’re satisfied, select the REVIEW & BUY button to give your book a final check over.
Congratulations! You’ve built your own personalized photo book.
Want more? View our Photo Book Tutorials
We’ve compiled a few simple tutorials to help you get started with the new Snapfish builder.
This ‘How to create a photo book: The basics‘ demonstrates how to import photos, use the various tools (ie. Autofill and Shuffle). As well as how to manipulate photos, add and remove pages and get you creating your own personalized photobook in a matter of minutes.
This ‘How to create a photo book: Intermediate‘ demonstrates how to create and edit photo books on Snapfish. It shows how you can edit photos on a page, use layouts, and apply backgrounds and designs.
This final section: ‘How to create a photo book: Advanced‘ demonstrates how to use layouts and backgrounds, reorder pages and add or delete pages from your photobook project.
We love seeing what you come up with! Please tag us @SnapfishUS and #snapfish on Facebook, Instagram & Pinterest. Check out the Snapfish site for even more custom gift ideas.

